Friday, June 7, 2013

Day 40: Retrospective

Now that I am once again focusing primarily on Android development this may be the end of the road for my crash course in iOS (at least for now). Here is a summary of some of the lessons learned during my brief experiment as an iOS user and developer.

1. Android and iOS are more alike than different.


Despite different hardware, operating system, language, and development environment ultimately both Android and iOS are mobile computing platforms. You still need to solve many of the same problems including resource management, network communication, and designing for a small screen.

Some aspects of iOS development have actually helped me become a better Android developer. Using the common delegate pattern on iOS has helped reinforce the value of extracting logic from my Android Activities and Fragments into objects with a proper Interface (Protocol).

Even the differences in syntax between Objective-C and Java, while significant at first, quickly fade into the background as you get used to all those square brackets.

2. The differences are significant.


Building a UI is very different on iOS. The technique most Android developers use is based on editing layouts in XML. In iOS UI editing is done graphically through Interface Builder or Storyboards. Or written purely in code. But there is really no good option for a declarative markup syntax since the code produced by the graphical tools is not human readable.

Navigation and integration are also drastically different on iOS. Android uses Intents to transition between screens within the same application or even to integrate with other applications on the device. In iOS transitions are a function of the graphical UI editor, or can be accomplished in code by keeping a reference to the various view controllers and manually adding/removing subviews from the root view controller. Integration with other applications is not possible in the same manner as Android but can still be accomplished to some extent using techniques like a custom URL scheme for deep links or a shared Pasteboard.

Storyboards in XCode

3. Everything is in the foreground.


As an iOS user and developer I could not get over the fact that almost everything must happen while the app is in the foreground. The end result is that many apps feel slow and stale as compared to their Android counterpart. Not being able to spin up a background service to periodically sync data or poll location means that each time you open an app you have to wait for it to fetch fresh data.

For example, each time I would receive a notification for new message in GMail on iOS I would start reading a preview of the message in the notification. Then I would open the GMail app and I would have to wait for the data to sync before I could continue reading the rest of the message. I guess I am spoiled on Android but this feels like bad UX. Making users wait to see the newest content is a waste of their time.

4. Test-driven development is alive and well on iOS.


Many times in the past I have heard from iOS developers that unit testing and TDD/BDD is either difficult or impossible. I'm not sure how much this has changed in recent versions of the OS, but in my experience testing on iOS is not only possible but the tools are even better than what is currently available on Android. While projects like Robolectric have improved the situation, Android still has a long way to go to enable efficient unit testing that is fully integrated with the platform.

On iOS you have a variety of testing frameworks available. During this experiment I successfully test-drove my code using OCUnit, Kiwi, and KIF. Other options include Cedar, Cucumber/Calabash, and UI Automation.

And iOS has the added advantage that running tests on the simulator is much faster than deploying to an Android emulator or device which means that even running integration and functional tests though the UI is quite fast comparatively.

For a sample test-driven iOS app check out Three the Hard Way (HelloTDDiOS).

Summary


Even though hands-on iOS development may not be something I am going to do professionally on a regular basis, increasing my literacy of Objective-C and my understanding of the platform has still been beneficial.

It has improved my vocabulary and comprehension in discussions with iOS developers. It has given me a better overall understanding of mobile ecosystems that span across multiple platforms. And it has prompted me to make an effort to work more closely with my iOS counterparts day-to-day because in the end we are solving many of the same problems.

Only Android does it a little bit betterAndroid wink


Big thanks to Matt Smollinger and Matthew Lim for their reviews and feedback on the draft of this post.

Wednesday, May 15, 2013

Day 21: Google I/O

I am writing this post while waiting for the keynote to begin at Google I/O 2013.

In anticipation of the largest Android event of the year, I've temporarily switched back to my Nexus 4 from the iPhone 5. Originally I considered sticking with the iPhone this week as a true test of my commitment to this experiment but ultimately decided I didn't want to miss out on any Android goodness while here.

What has been surprising here at the Moscone Center is the number of iPhones I see being used by attendees and the number of developers I've spoken with who work on both Android and iOS. Perhaps dual specialization as a mobile developer is not as uncommon as it once was.

Well the keynote is about to begin. In typical conference fashion the wi-fi here is barely functional so I'll have to post this later.

Update:

Posted from my new Chromebook Pixel. Thanks Google!

Wednesday, May 8, 2013

Day 14: TDD

I have been a long-time proponent of the principles and benefits of Test-Driven Development. All of my Android projects use Robolectric and the built-in instrumentation testing framework. So naturally, when I decided to explore iOS, testing was one of the first things I wanted to investigate.

Fortunately there is no shortage of quality testing frameworks for iOS. I decided to focus my efforts on 3 of the available frameworks:

OCUnit

Based on the SenTest framework, OCUnit is a traditional xUnit style unit testing tool that comes bundled with the iOS SDK.

Kiwi

An RSpec style testing tool with an extensible expectation syntax and built-in mocking tools for Behavior-Driven Development (BDD).

KIF

A fully automated functional testing tool that simulates user interactions by leveraging accessibility attributes provided by the OS.


Three the Hard Way (HelloTDDiOS)


Three the Hard Way is a sample application I created to showcase all 3 testing frameworks in action. The app itself is very simple but provides a good forum for experimenting with various testing techniques.

Based on Your first iOS App tutorial on Apple Developer, Three the Hard Way allows you to enter a name via text input, click a button, and view the resulting greeting.


Development of the app was 100% test-driven using OCUnit. Below is an example of tests written to exercise the button callback in the view controller.

And the production code that was written to satisfy these tests. Notice how the tests use an instance of MockHelloTDDViewControllerDelegate to test the view controller in isolation rather than GreetingFactory (the actual delegate used in production).

And here are the same tests rewritten using Kiwi.

Finally, here is the end-to-end integration test using KIF that tests the button through a scripted UI interaction.

In order for KIF to locate the UI elements, we must set the accessibility labels in (void)viewDidLoad.

Fork the full project at https://github.com/ecgreb/Three-the-Hard-Way. Feedback is welcome.

Monday, May 6, 2013

Day 12: Battery Life

Standby Battery Life

This weekend I didn't charge my iPhone 5 from the time I left work on Friday afternoon until Sunday night when I went to bed. And I still had 17% battery remaining. That is rather impressive.

Granted I did not use my phone very much as it was beautiful outside and I spent most of the weekend power washing and applying joint sand to my brick patio. This is not a scientific study, but in my experience the standby battery life of my iPhone is much better than what I have had on any Android device (and I've had a lot of them).

Background Sync

Again, we are talking about battery consumption during times of sparse usage here. I can only assume one of the reasons for the iPhone's strong standby battery life comes from the fact that very little is happening when the device is idle. Apple does not allow third party applications to spin up long-lived background services with a few exceptions like Android does.

There is a tradeoff here. When I receive an APN to let me know I have a new message in GMail I can even read a preview of the message in the notification. But then when I open the GMail app to read the rest of the message it's not there. I have to wait for the app to sync with the server. With Android, the new message would already be there. And not just for Google apps-- any app can take advantage of background sync using a Service.

For me the extra standby battery life is not worth the time I have to wait each time I open an app for it to fetch fresh data from the server. In this age of on-demand computing it should already be there.

What do you think?

Thursday, May 2, 2013

Day 8: Provisioning Profiles

Steps required to install and run a development build of an Android app on a local device:
  1. Open Settings > Developer options menu on the device and check the box for USB Debugging.*
  2. Build and launch your app using Eclipse, IntelliJ, Ant, Maven, or Gradle.
  3. There is no step 3.
* On newer devices running Android 4.2 or later, if the Developer options menu is not visible go to Settings > About phone and tap the build number 7x to enable developer options.


Steps required to install and run a development build of an iOS app on a local device:
  1. Create an Apple ID at https://developer.apple.com/register.
  2. Register for the iOS Developer Program ($99) or join an existing iOS Enterprise Developer Program account (via email invite).
  3. Complete account creation and fill out professional profile.
  4. Sync your device with a computer using iTunes.
  5. Add your device to the Member Center using Xcode Organizer tool.
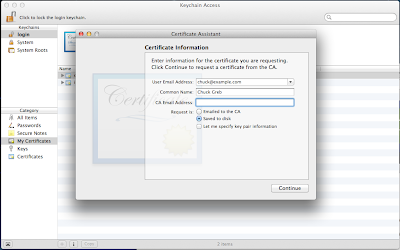
  6. Create a Certificate Signing Request (CSR) using Keychain Access utility.


  7. Upload the CSR to the Member Center and generate a signed certificate (requires admin access).
  8. Download the signed iPhone Developer certificate and install it in Keychain Access.
  9. In the Member Center, check the active iOS Provisioning Profiles for development. If there is an active development profile managed by XCode, you should be able to refresh the Provisioning Profiles in Xcode Organizer to automatically update to include the new development certificate. If not, or if the existing profile fails to update (as it did for me), proceed to step 10.


  10. Create a new iOS Provisioning Profile for Development. Be sure to include the iPhone Developer certificate you just created and your device in the profile.
  11. Download the new Provisioning Profile and drag it into the iTunes Library panel.


  12. Sync your device with iTunes to install the new Provisioning Profile.
  13. Build and launch your app using Xcode or (in my case) AppCode.
Just a bit more complex that what I have been used to with Android. My actual process involved many more steps of trial and error before I was able to distill it down to this (streamlined?) version.

If you are new to iOS like me... hopefully this guide will save you some time and frustration.

If you are a seasoned iOS developer... isn't there a better way!?

Monday, April 29, 2013

Day 6: Top 20 Thing I Miss Most about Android

Top 20 things I miss most about Android after my first week as an iOS user:
  1. Show password
  2. Background sync
  3. Lower case letters keyboard when keyboard is lower case
  4. Easy access to frequently used punctuation on keyboard
  5. Long press for numbers and symbols on keyboard
  6. Tap to place cursor in the middle of a word
  7. Home screen widgets
  8. Lock screen widgets
  9. Unlock pattern
  10. The Action Bar
  11. Developer options
  12. Stay awake while charging
  13. Logcat
  14. FREE client for 1Password
  15. Photos in my contact list and favorites
  16. Ringtones and alarms (Who really uses Bark or Duck?)
  17. Share button
  18. One click app install
  19. Google Now
  20. Back button
Update: Google Now launched today for iPhone and iPad. I'm not sure if/how it will be able to achieve the same level of prediction and integration with other apps as on Android - but we shall see.

http://googleblog.blogspot.com/2013/04/google-now-on-your-iphone-and-ipad-with.html

Friday, April 26, 2013

Day 3: Development Environment

XCode is the official IDE and a natural choice for new iOS developers. However I have been a longtime user of IntelliJ IDEA for Android development as well as other JetBrains products including PhpStorm, PyCharm, and RubyMine.

Hoping to leverage my existing knowledge of these other IDEs, after a brief introduction to XCode I decided to try AppCode, the JetBrains Objective-C IDE.

AppCode runs on top of XCode, meaning XCode must be installed, and even uses XCode for all graphical UI editing capabilities. Anytime you open a Storyboard (.storyboard) or Interface Builder (.xib) file in AppCode, it launches XCode to interact with that file.

At first glance I like the overall layout of AppCode better, but that could be just because I am unfamiliar with XCode, where I still have a hard time finding things. And AppCode's Darkula theme is so much easier on the eyes than the bright white editor of XCode. Already being fluent with IntelliJ's keyboard shortcuts, it was pretty easy to get started. AppCode also gives you the option to use XCode's keyboard shortcuts (as well as many others).

One of the features I appreciate most about IntelliJ is the powerful code completion and code generation engine. The ability to quickly hit Option+Enter to generate a new class/method/variable on the fly saves a ton of time when coding. While the same concept exists in AppCode, these tools seem slightly less refined in IntelliJ's younger cousin.

For example, when attempting to call a method that does not exist, the statement is underlined in red.

The method someFunctionThatDoesNotExist appears with a red underline because it is not yet defined.
Pressing the keyboard shortcut for QuickFix Option+Enter reveals the ability to create a new method or property. This will update the header file StackOverflowManager.h and implementation file StackOverflowManager.m with a skeleton for the new method. If this function included input parameters those would also be configured through a form in a modal window.

The Option+Enter keyboard shortcut for Quick Fix reveals the ability to create a new method or property.
Here is another example of calling an undefined method, but this time the call is nested inside a macro. This example shows a SenTest macro from the OCUnit testing framework.

The method someFunctionThatDoesNotExist is currently undefined.
Unfortunately when the undefined method is written as an argument to the macro the option to create a new method or property is not available. This is unfortunate because calling a new function inside a macro is especially common when writing new code using test-driven development.

Quick fix keyboard shortcut does not reveal create method/property options when nested in a macro.
The workaround here is to declare a local variable to capture the result of the undefined method.

Result of someFunctionThatDoesNotExist is assigned to a local variable.
Now declared outside the macro the advanced code generation tools are once again available.

Option to create new method/property is revealed when declared outside the macro.
What also seems to be missing is the ability to quickly generate a new test method using Control+N in a test file. Looks like I will be adding a custom Live Template for this use case, which is an AppCode extension to XCode snippets.

For more code generation goodness, checkout this article on the official AppCode Blog.

Does anyone else have experience using both XCode and AppCode? If so, I am interested to hear about which one you like better and why in the comments.